Dining Room Buffet Makeover
Today, we’re finally sharing the dining room buffet makeover which has honestly undergone a big transformation!
This painting technique is easy to replicate and can be used for almost any wood furniture makeover.
There’s a lot of pictures to get through today so let’s get started…

Several Years Ago…
Several years ago, my sweet cousin called to say her friend’s grandpa had passed away and they were cleaning out the family’s barn.
Inside the barn they found this small buffet and she brought it home thinking I might be able to use it on a bedroom makeover we were working on.
The only caveat was that it needed a bit of work.

The top was split into planks and the veneer on the sides and the fronts of the doors was starting to chip away which didn’t bother at all.
At the time, I gave it a quick makeover using Annie Sloan Chalk Paint in French Linen, used it as a nightstand in one of the bedrooms and called it good to go.
Shopping the House for a Solution…
Fast forward to the beginning of January when we were talking about our home goals for the year and S said she thought we should find a new way to store my brown and white transferware collection.
We had previously been using this piece made from the last of the original fencing at Loblolly Manor. So, these three tiers were super sentimental to me.
Looking back, I can totally see S’s point though, it does look a bit industrial to be in the dining room.

My Mom and I searched for weeks to try and find a replacement piece for the three-tiered piece. But every week we would come home empty handed.
I finally decided to “shop the house” and remembered the small buffet we’d been using as a nightstand.
Then I asked my Dad to shore it up so it would be sturdier because I wanted to repaint it and give the buffet a completely fresh look.

Dining Room Buffet Makeover…
I dropped the buffet off at my parents house and the following week, my Dad delivered the dining room buffet makeover back to me.
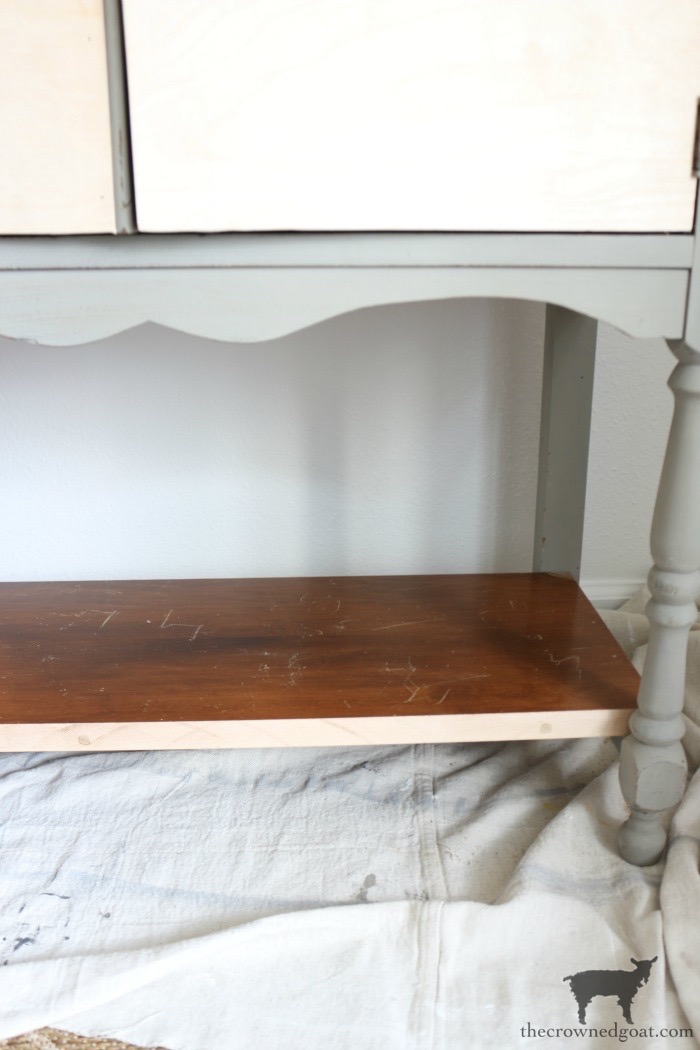
As you can see here, it took quite a bit of overhauling to shore it up completely. Not only did he have to redo the top,

the inside shelf,

the outside panels,

including the front doors of the buffet,

he also added a shelf at the bottom so it would be more functional in the dining room.
Repainting the Dining Room Buffet…
As excited as I was to have the buffet almost completely rebuilt, I wasn’t really sure how to join all the different species of wood and paint.
So, I decided to paint the entire piece with Milk Mustard Seed’s Milk Paint in Marzipan and make the buffet all one color.
I used two full coats of Marzipan allowing for plenty of drying time between each coat.
My initial plan was to call it a day, but it just didn’t have the layered patina look I was after. And as you guys know, the only way to get a layered paint and patina look is to layer paint and create a patina.

I added layers of Annie Sloan Chalk Paint in Old White and Pure White over the Marzipan.

At first glance, it didn’t seem to make that much of a difference, but you can definitely see the subtle color change here. The Marzipan is on the outside and the Old White is on the inside.

Adding a European Oak Inspired Top…
After the body of the buffet was set, I decided to start working on the top. I really wanted to use a European Oak technique technique on this piece.
But in order to do that I would have to use an orbital sander to sand down past the stain. The buffet was too heavy for me to move on my own though and obviously sanding inside is a big no-no.
So, I did the next best thing which is to create a wash and start layering paint that way.
This is what the top looked like after two coats of Marzipan.

Then I lightly sanded the top creating the appearance of wood grain.

Next, I added a wash of Paris Grey and allowed it to settle into the sanded areas a bit.

then wiped away the excess with an old cloth.

Before finally adding wash of Faint Maple. It’s a little time consuming but the end result is worth it.
I sealed the top of this buffet with hemp oil.

Adding Wood Appliques to the Dining Room Buffet Makeover…
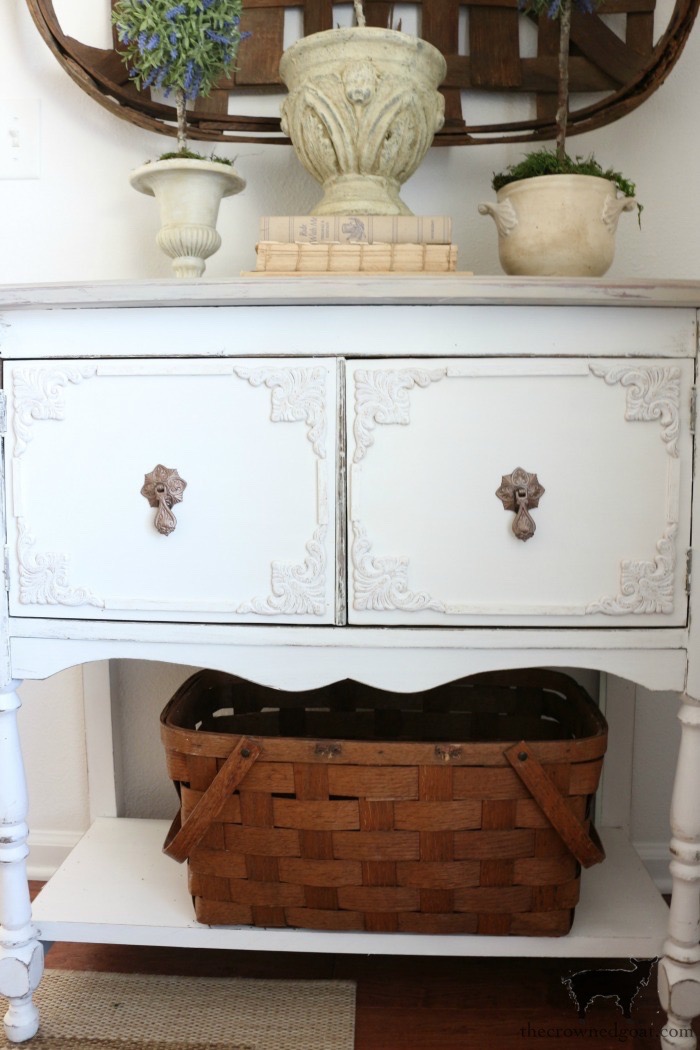
At this point, I could have been done. But the dining room buffet makeover seemed a little plain.
I was worried if I didn’t find a way to punch it up some, the scale of the tobacco basket was going to overwhelm the scale of the small buffet.

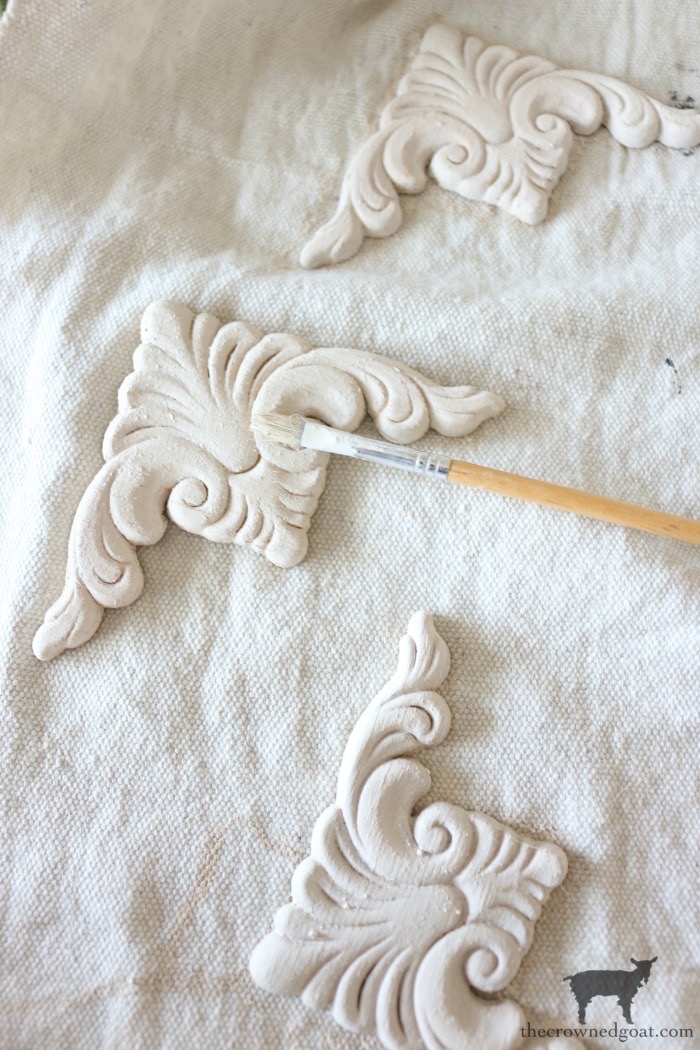
We headed to Lowes in search of some wood appliques or accents and I found these for less than $5 for a pack of 2.

I painted the wood appliques in Marzipan and allowed them to dry.
Then secured them in place with Liquid Nails, wood scraps, and clamps. Make sure you allow plenty of time for the Liquid Nails to dry and adhere.

Once the wood appliques were secure, I added a bit of dark wax over the raised areas of the appliques to help bring out the details.
Now, had this piece been the only piece in the dining room, I probably would have kept it this way because all those swirly details on the wood appliques were really pretty.

But something about it just felt like it was competing for attention. I also had to consider the fact the antelope print curtains will be right next to this piece.
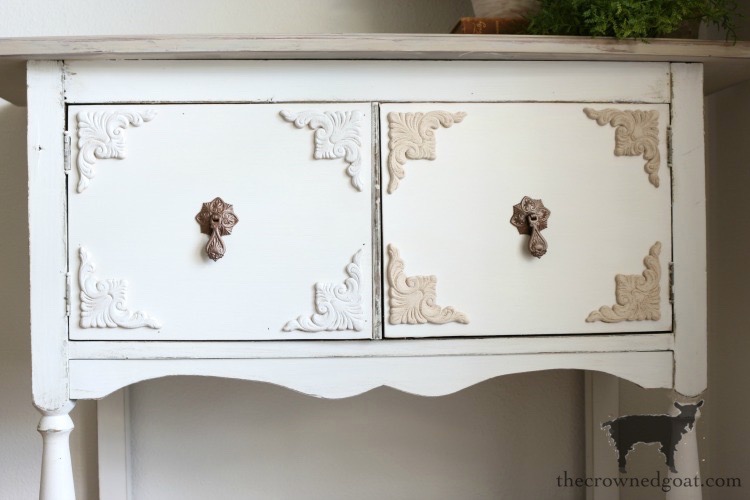
So, in the end, I decided to tone the wood applique details down a bit, paint them white and highlight the raised areas with dark wax. As you can see here, two completely different looks yet equally as pretty.
To finish this piece, lightly distressed the buffet with a fine grit sandpaper so the French Linen, the Marzipan and the wood layers could show through.

Then I followed with clear furniture paste wax.

Almost there, but not quite finished, an update…
(*June 2020 update)
We’ve enjoyed the dining room buffet makeover as pictured here for over a year. And while, I’m so thankful to have this piece, there was always something about it that seemed a bit…off.
As in almost there, but not quite finished…

I couldn’t put my finger on it though.
One night, I was flipping through one of my favorite home decor books I’ve read a least hundred times and I saw what was missing…
…a connection between each of the appliques.

Connecting the Appliques…
Connecting the appliques was super easy!

I used scrap pieces of wood trim we already had on hand and cut each piece to size.

Next, I painted each trim piece and allowed it to try completely before sanding them with a sanding block.

Then I used E-6000 glue to apply the pieces of trim between the wooden appliques.
Keep in mind, E-6000 has a highly offensive odor. So, be sure to use caution and care, read all instructions prior to using this product and make sure to you’re applying glue in a well ventilated area.

Use clamps to hold each trim piece in place until the E-6000 has completely dried.

Truthfully, adding the trim pieces in between the wood appliques seems like such a small detail to even fuss over.
But the dining room buffet makeover feels more finished now somehow.
I’m eventually hoping to move this piece out to the workshop once it gets finished because it’s the perfect height for taking photos.

Gosh, you guys, this dining room buffet makeover has had so many different twists and turns! I know this has been a long post.
So, let me just show you one more look at the dining room buffet makeover before…

during…

and after…

If you have a piece of furniture at home that seems a little off, don’t settle!
There are plenty of small tweaks you can make from painting, to changing out the hardware to adding feet or leg extenders to applying trim that can help give an old piece a completely fresh feel!
Other Dining Room Makeover Posts to Enjoy:
- Dining Room Makeover Reveal
- How to Condition a DIY European Oak Dining Room Table
- Paris Gray Hutch Makeover
- The Easiest Way to Revitalize an Old Tobacco Basket
- DIY Grainsack Inspired Wall Art
- Quick & Easy 5 Minute Topiary
Many blessings,
CoCo


This looks like a completely different piece. I actually liked the marzipan painted appliques but i can see how they would compete wkth the curtains. Plus everything else in the room.is a lighter shade. I’m cant wait to see it all.
Thank you Bonnie! I actually liked the Marzipan painted appliques too. In hindsight, I probably should have hung up the curtains first so I could see how much or how little they competed with the buffet. That said, I think the more toned down version of the appliques will work best for the long haul. Decorating is always a dance, right? Hugs, CoCo
That really turned out beautifully, CoCo! I loved seeing the process and the way you styled it is lovely, too!
Thank you so much, Linda! It’s been a fun space to makeover. I try my best to show each step because sometimes it looks like things should be finished in 5 minutes on TV but in real life it takes so much longer than what you plan ha ha. I hope your day is a fun one, CoCo
I love how you reused this piece, CoCo! It was fun to see your work and thought process…and I love how you staged it, too!
Thank you so much, Linda! I really appreciate it. Hope you’re having a relaxing week. Hugs, CoCo
Wowza, what a transformation! I love that you can see the potential in things. It’s super hard for me. Love this. Pinned!
Thank you, Cindy! It started out super rough after having come from the barn but I’m beyond thankful my Dad was able to help me with it all. He rolls his eyes every time I’m trying to explain something while waving my hands and thinking through my vision but he gets me 🙂 Hope you’ve had the best week, CoCo